

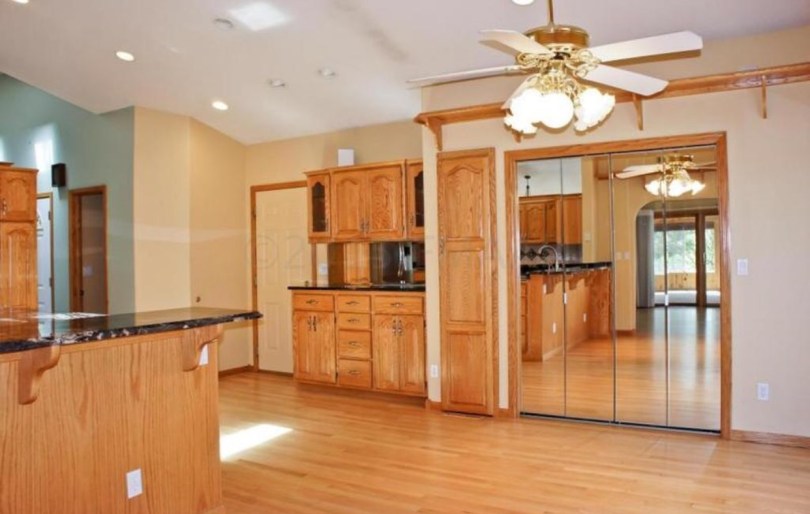
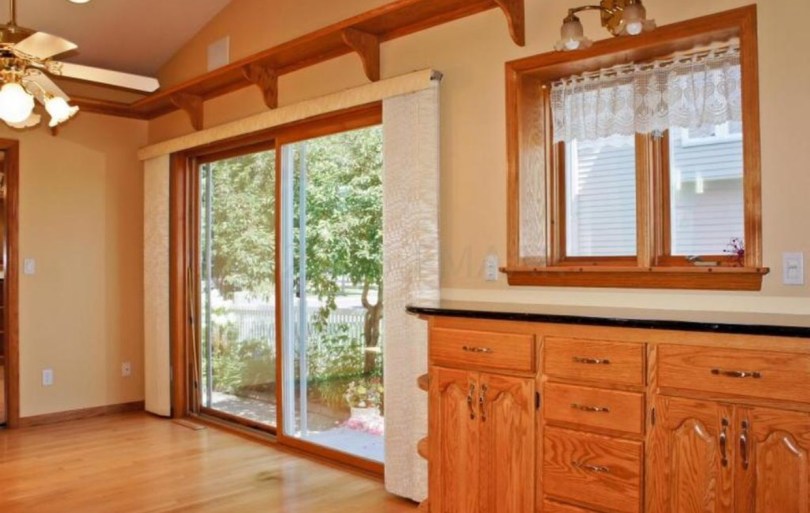
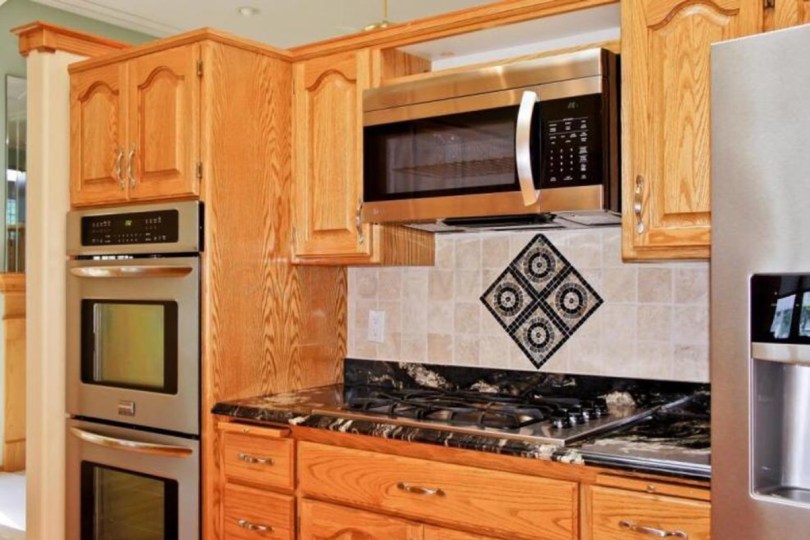
For a city on the prairie where trees are not native, this town sure has a lot of oak in it. And I don’t mean majestic trees for tire swings and shade, I mean every single kitchen built between 1985 and 2005. Somewhere, an entire oak forest is gone and every single branch of it ended up as cabinetry in Fargo, North Dakota.
Of course, oak is spectacular in terms of quality and sturdiness. But the honey oak tone (which becomes more orange hued as it ages) is anything but spectacular in terms of current design trends. The warm earth tones of the 1990’s have been retired and designers are embracing cooler grays, neutrals, blacks and whites. Kitchen cabinets colors and tones are also reflecting this trend.
So what are your options if you want to update your oak? Replacing cabinets completely is a small fortune. And if your cabinets are oak, they’re probably still in tremendously good and functional shape.
I first blogged about our kitchen updates previously in my post The Lighthouse – Kitchen Adventures which showcased the transformation that painting the oak white made. And then when we painted all of our oak trim white and replaced our interior oak doors with three paneled mission style stained black, I chronicled that journey in I’m Dreaming of a White (Trim!) Christmas . . .
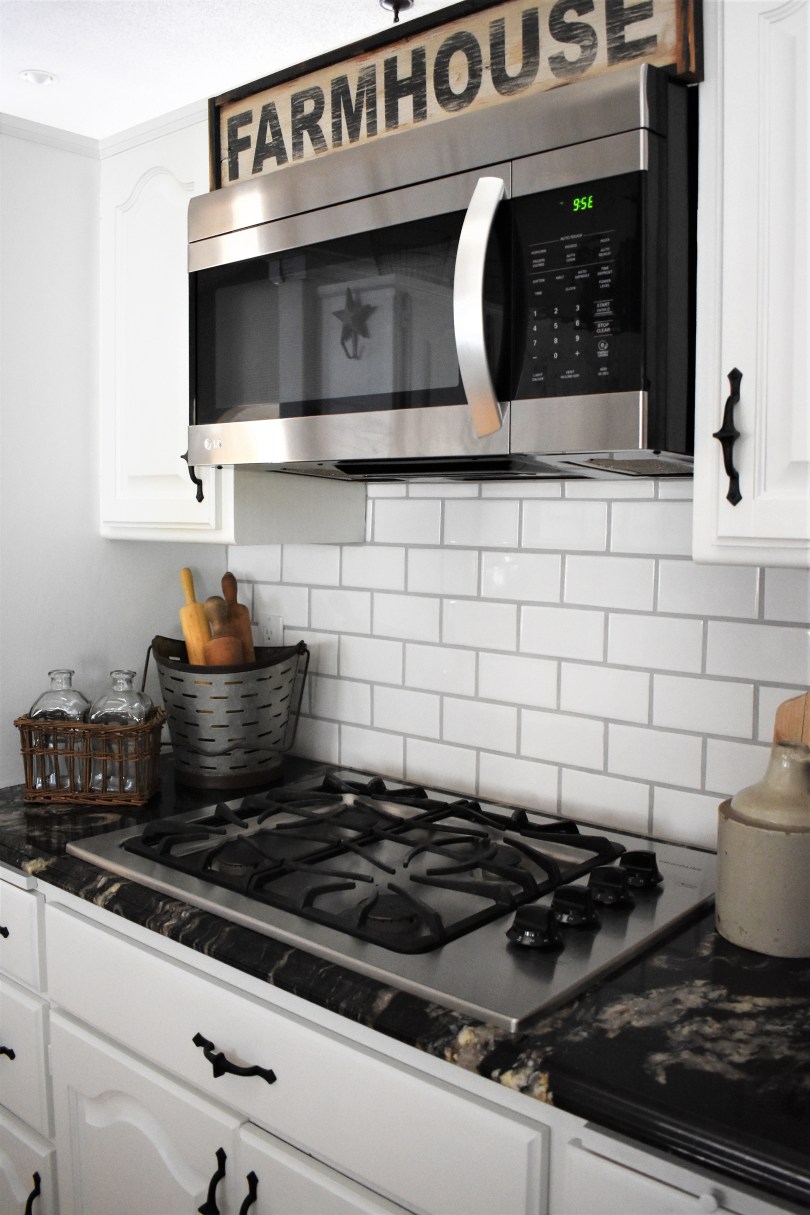
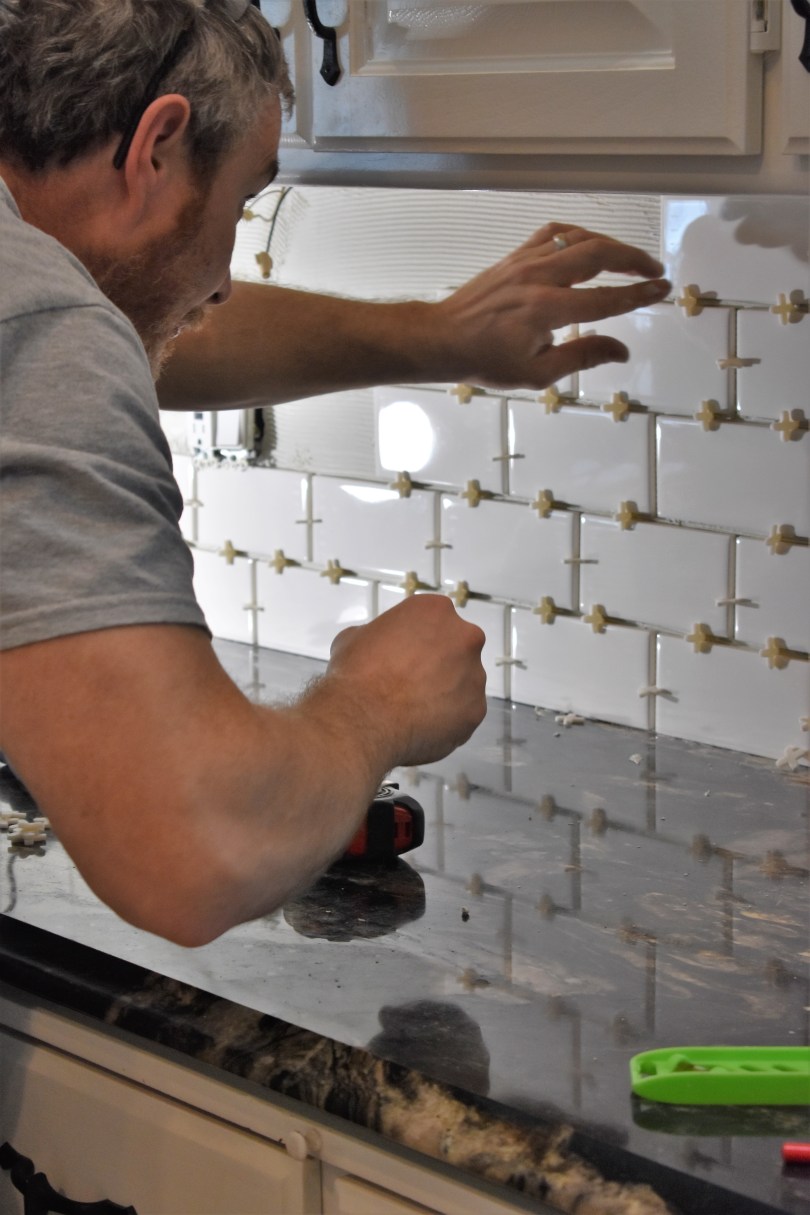
But this past week we finally replaced our dated back splash in our kitchen with subway tile and it really brought the whole project together! I’m so excited to post some photos of the big reveal. However, I’d like to first begin by reminding all of you what our oaky kitchen looked like when we bought it in April 2016 followed by current pictures from similar angles:
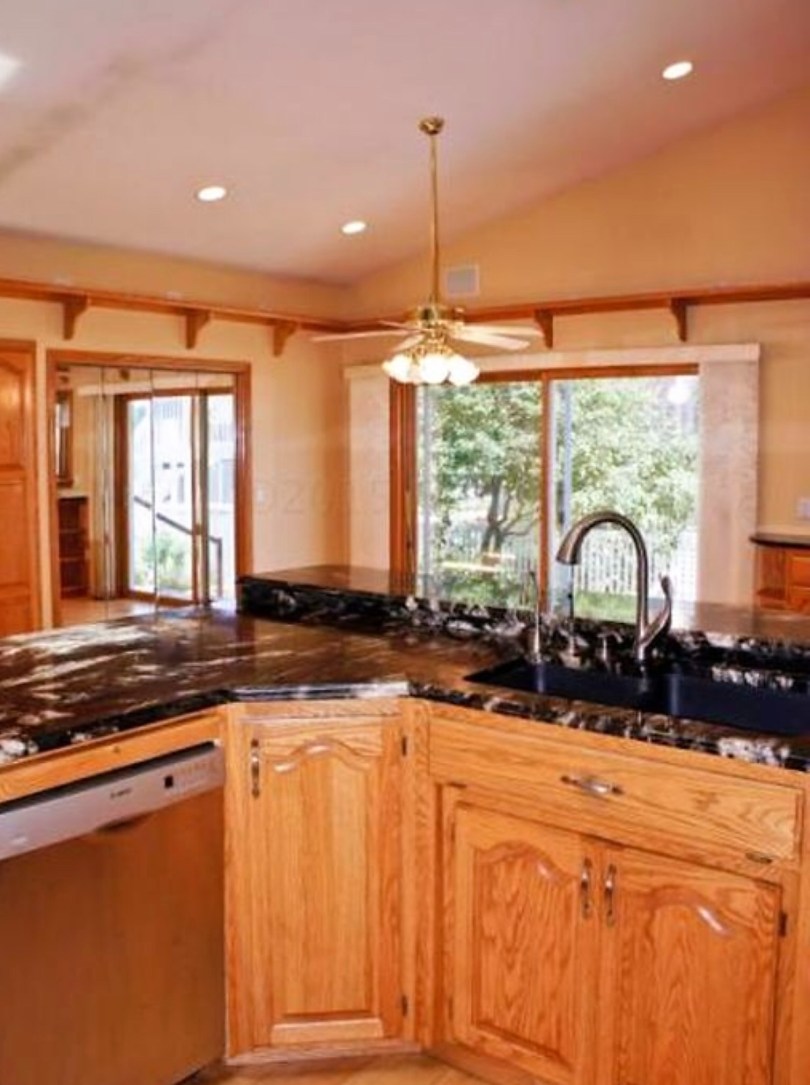
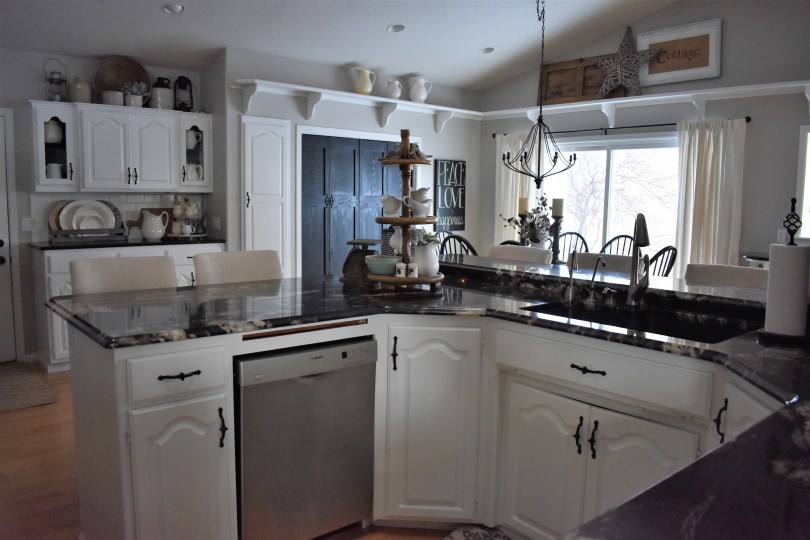


Pretty amazing what a little paint can do, isn’t it? If you are struggling with what to do with a dated honey oak kitchen and whether or not to paint your cabinets or replace them, these photos do illustrate quite well the end result of choosing the painting route. And in terms of spend, replacing all of your cabinets can be anywhere between $20,000 to $40,000. Painting them is a fraction of that cost.
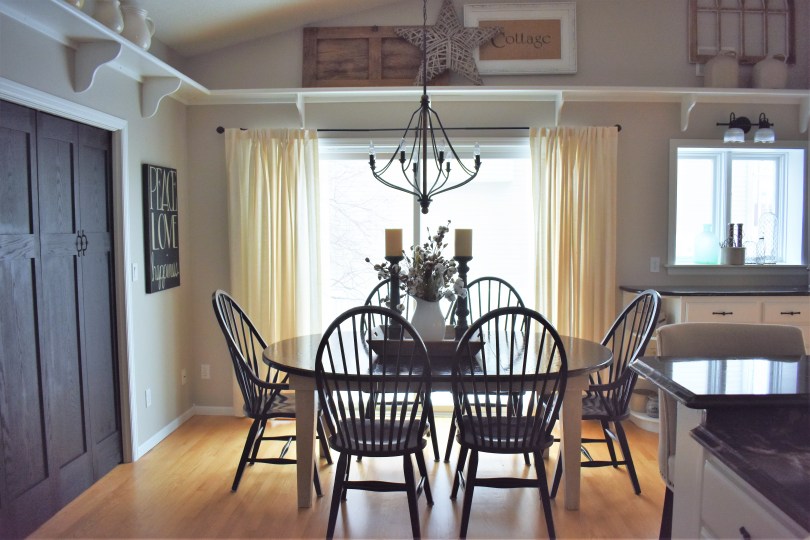
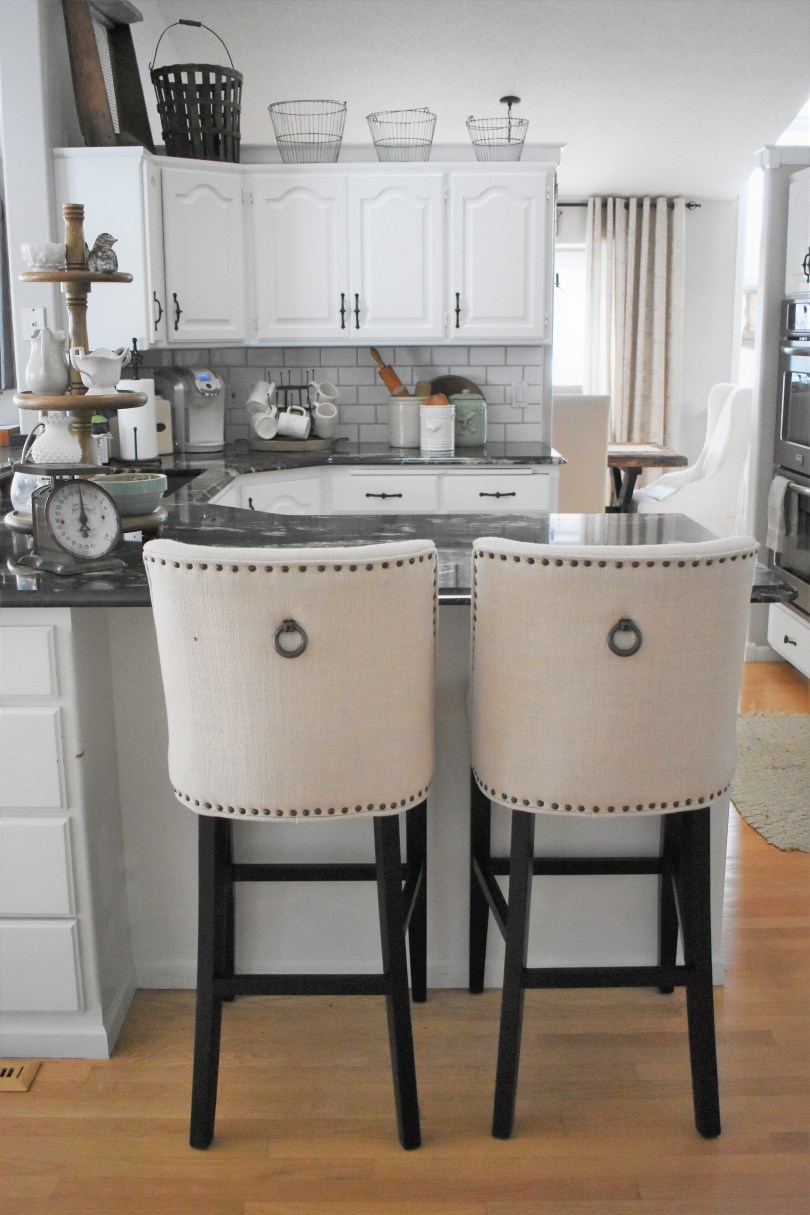
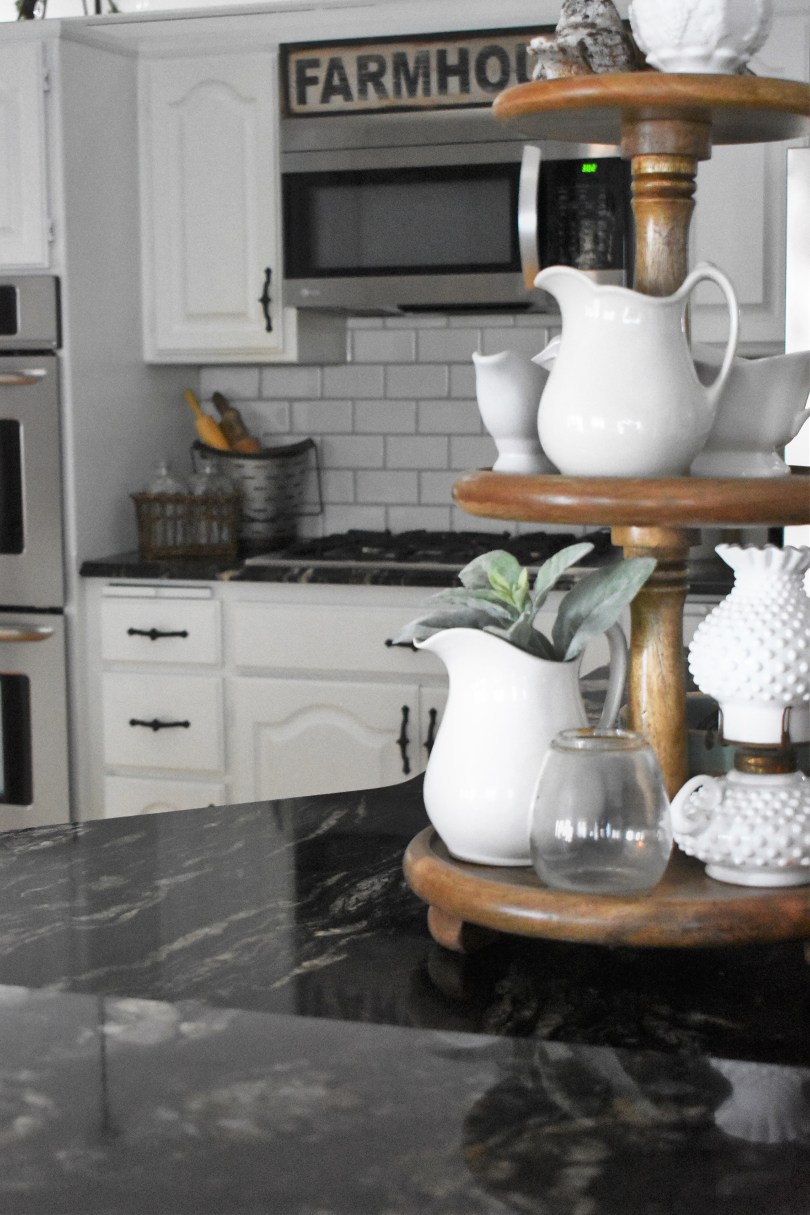
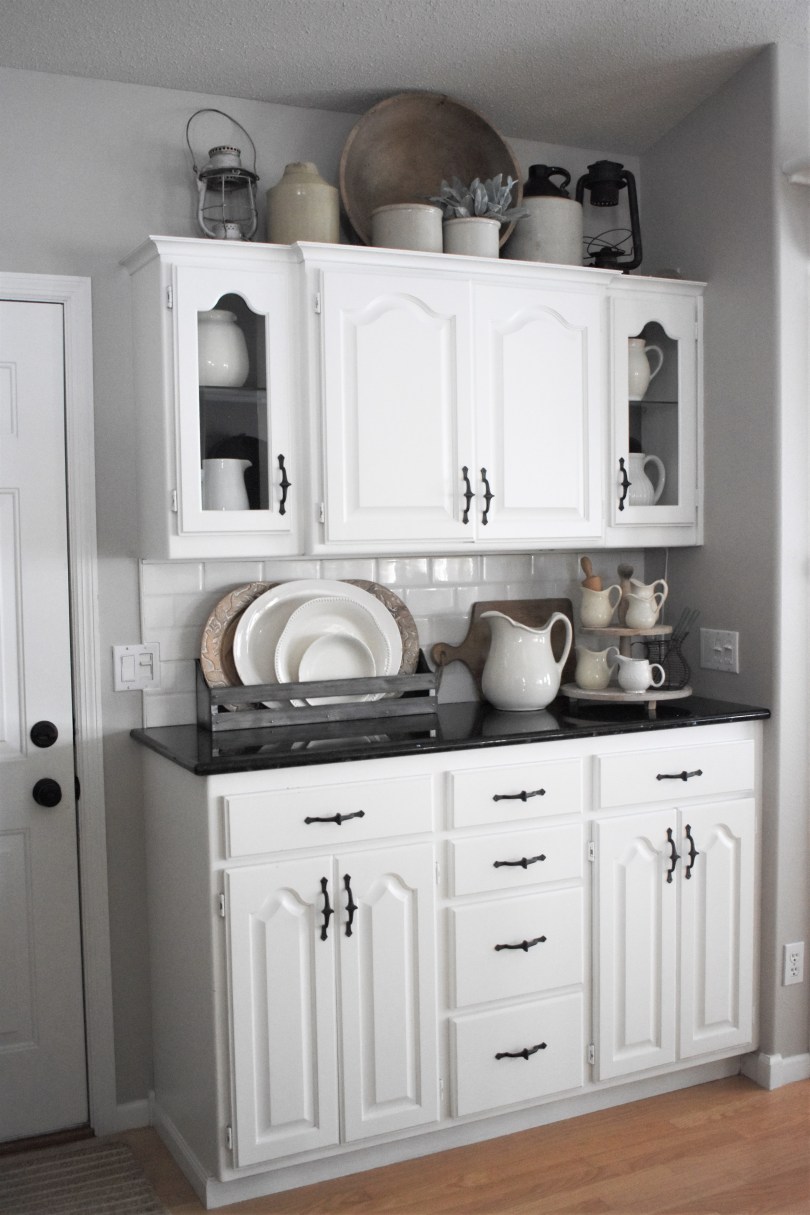
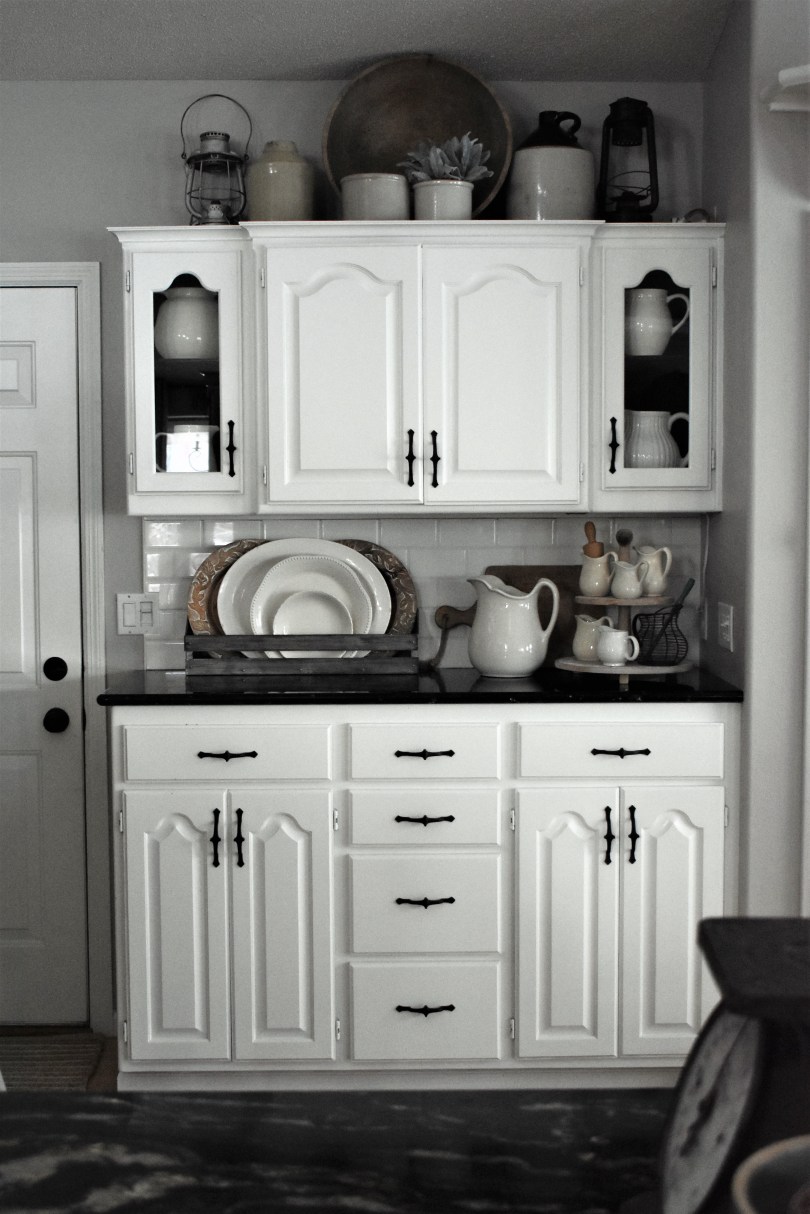
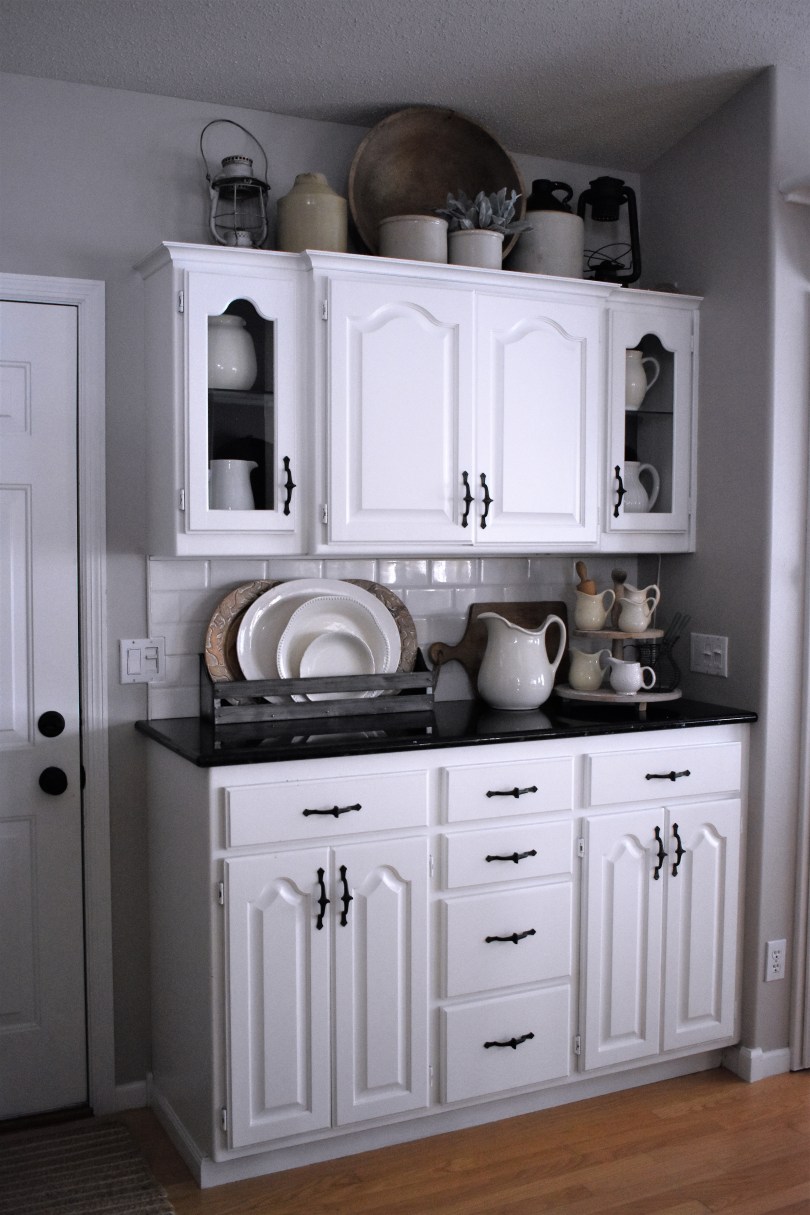
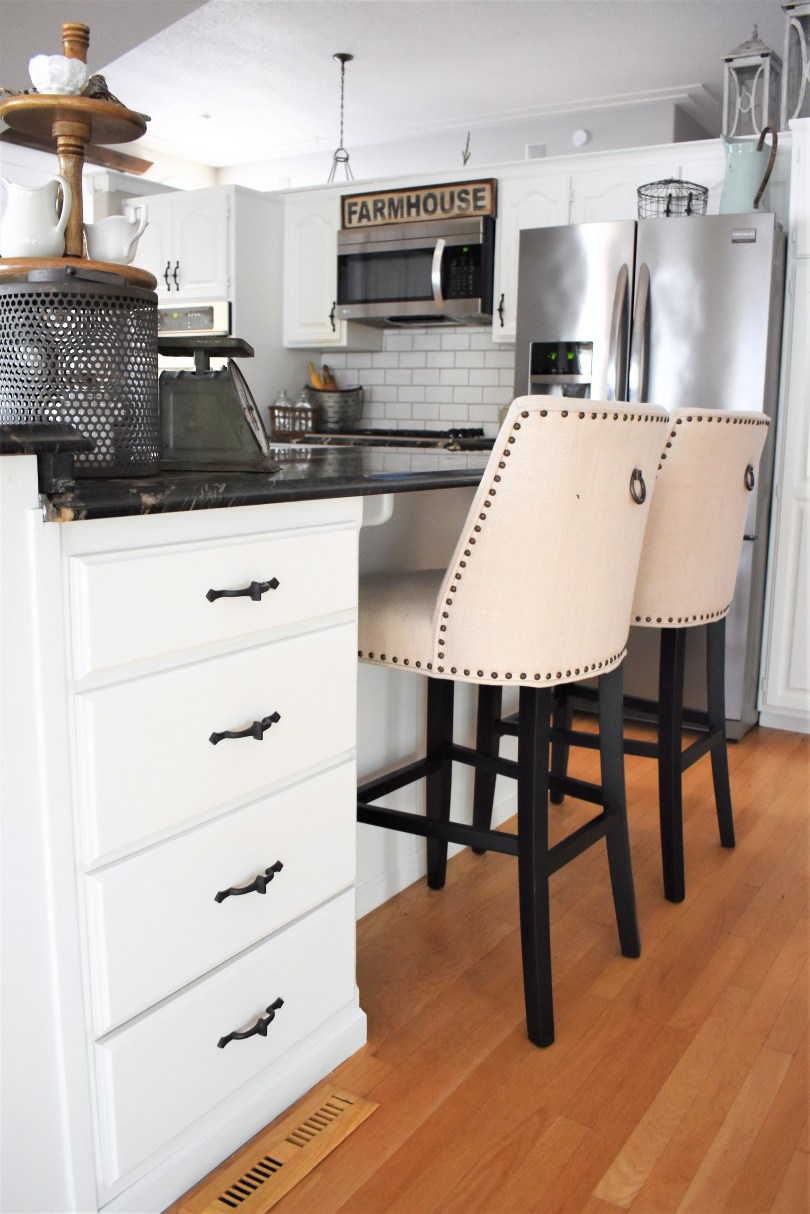
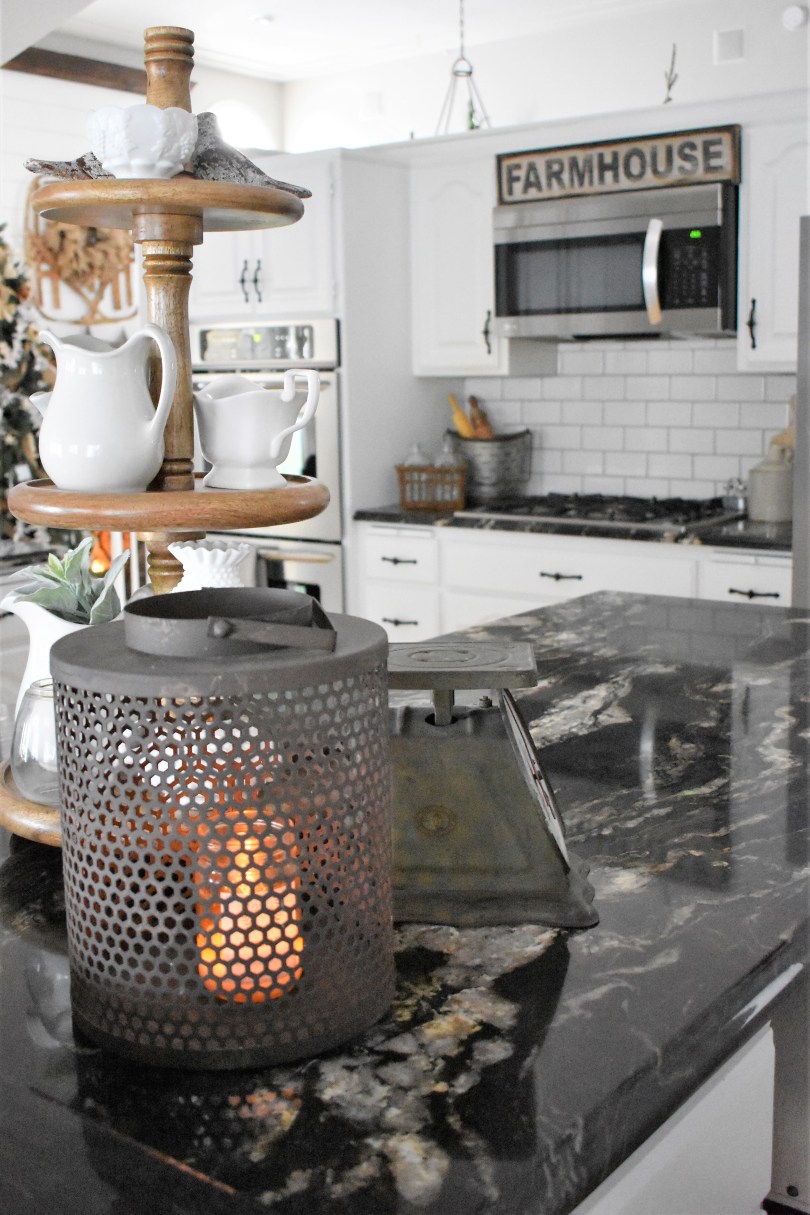
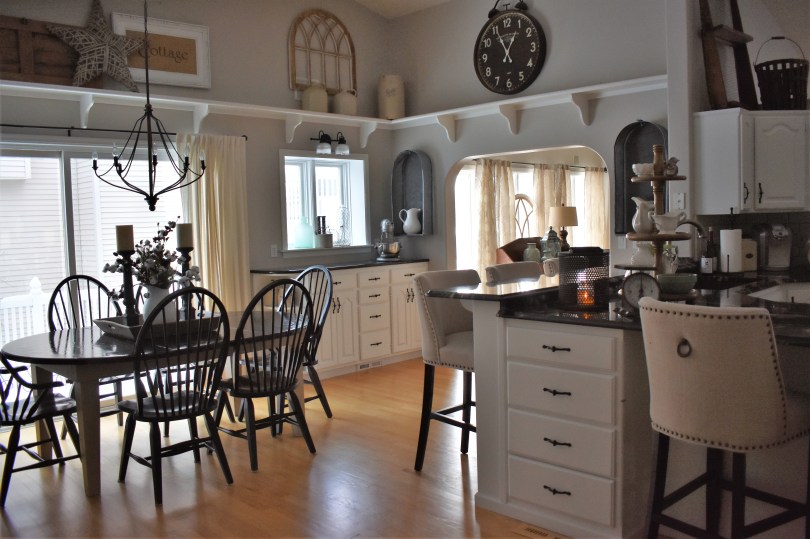
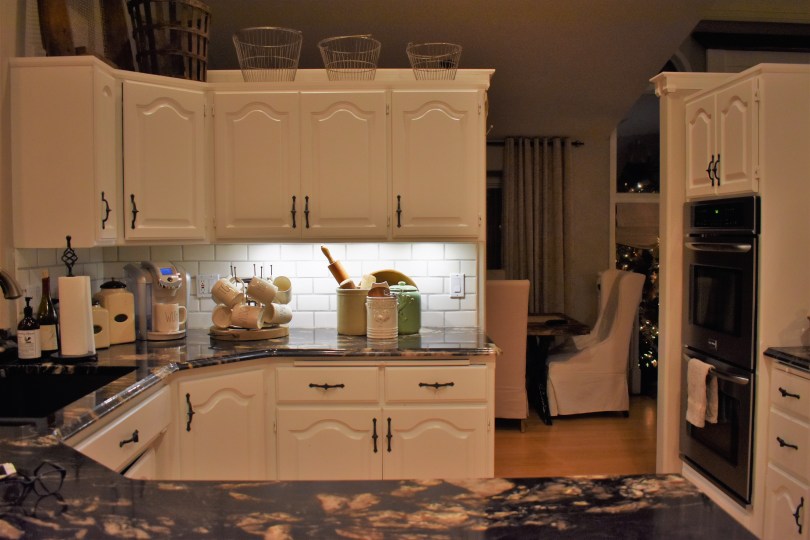
You’ll notice we also replaced light fixtures, cabinet pulls and removed the mirrored bi-fold doors in the dining area (Mirror Mirror on the Door). Those small finishes really make a difference! The next set of photos illustrate the impact adding an updated back splash made when we replaced it with subway tile. Have a peek:
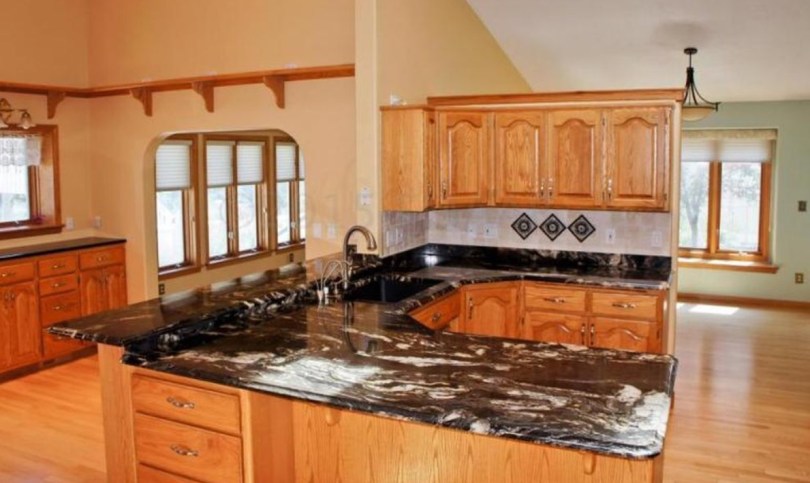
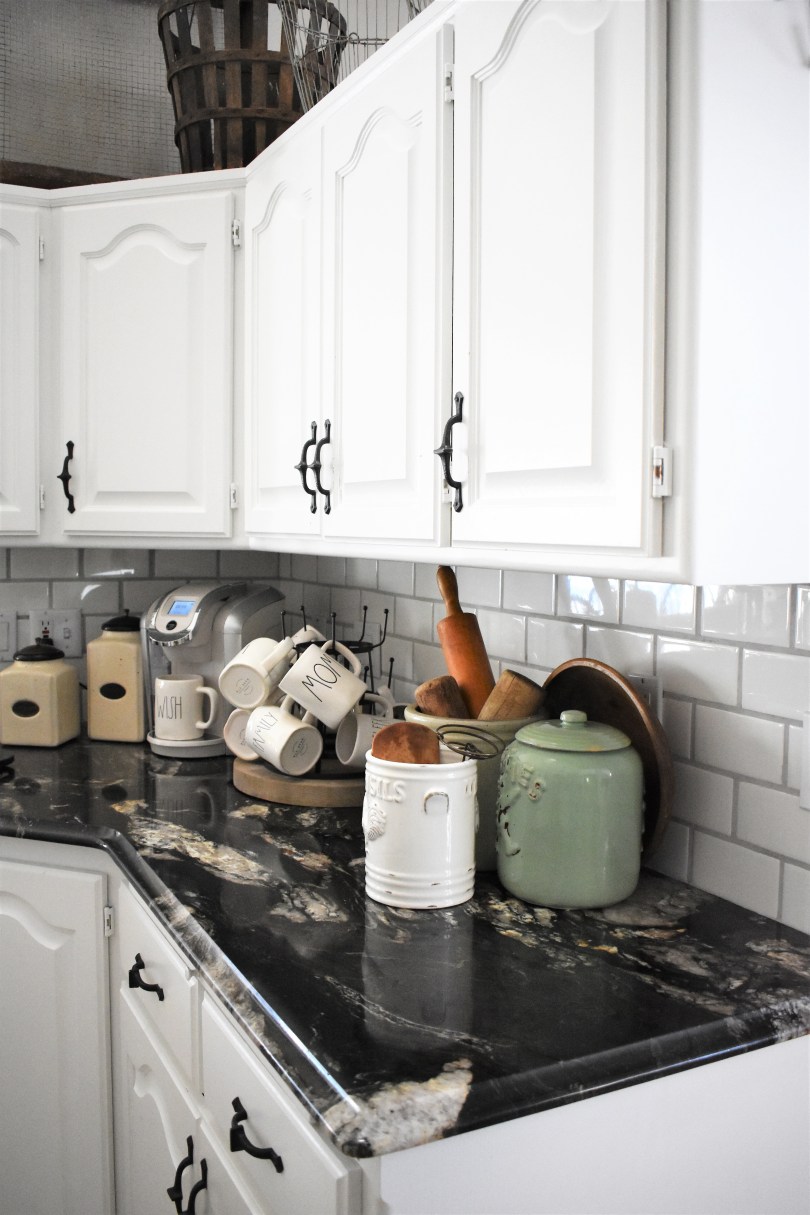
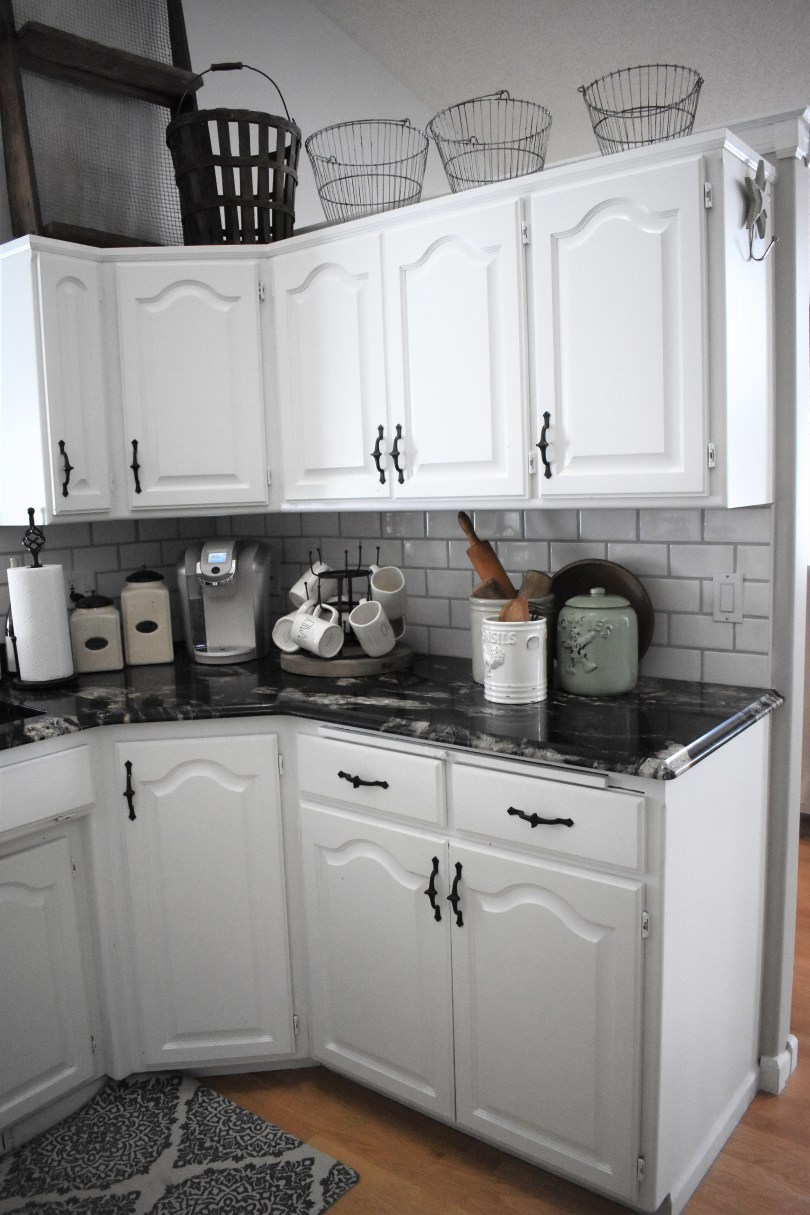
You’ll notice that before we cooled down the color scheme in this space, the busy granite pattern seemed to have a very prominent streak of yellow in it. This is because the mosaic back splash incorporated a yellowish cream tile and it pulled that color from the granite. Once that color was removed and the back splash was all white (with cool grey grout), only the cooler tones pulled from the granite.
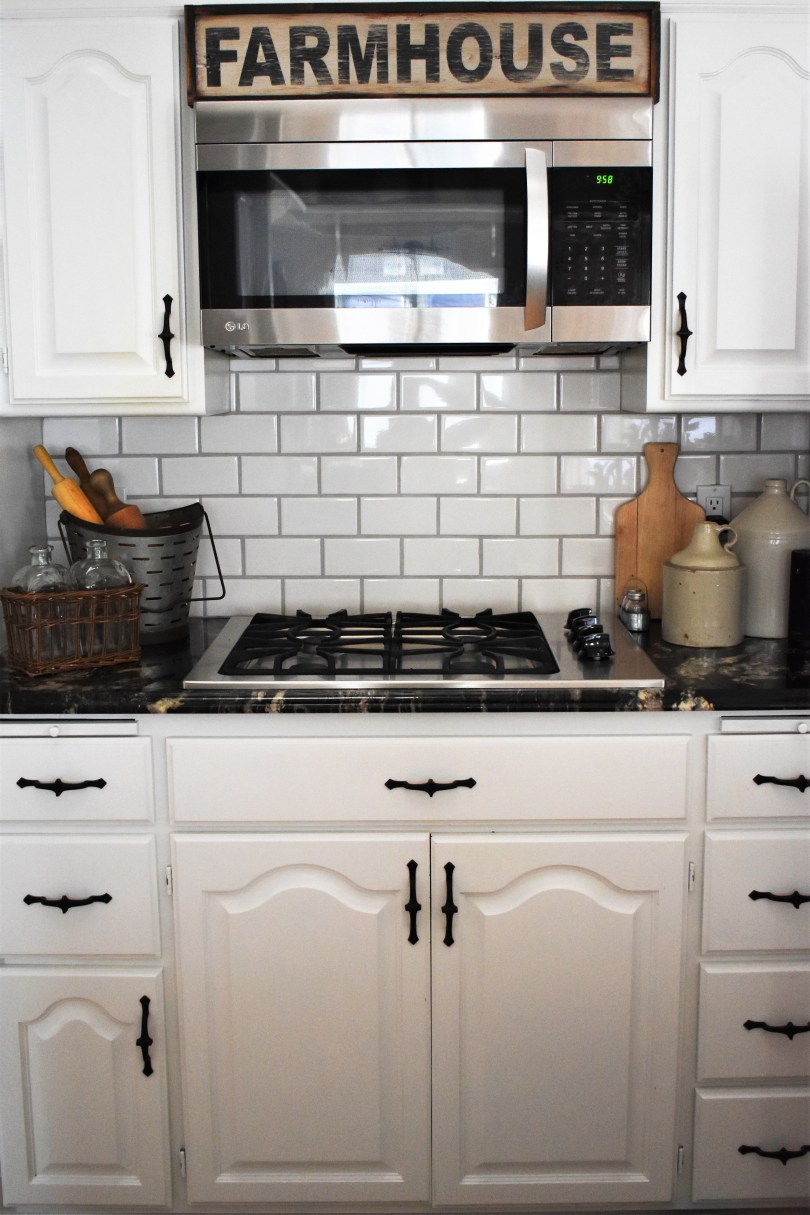
By removing the cream tile and the four inch granite back splash at the bottom, the entire space is now fresher, simpler and an overall cleaner look. It is almost magical how all of the yellow tones in our granite counter tops are GONE once the back splash was updated to subway tile. Only the cool tones pull now!
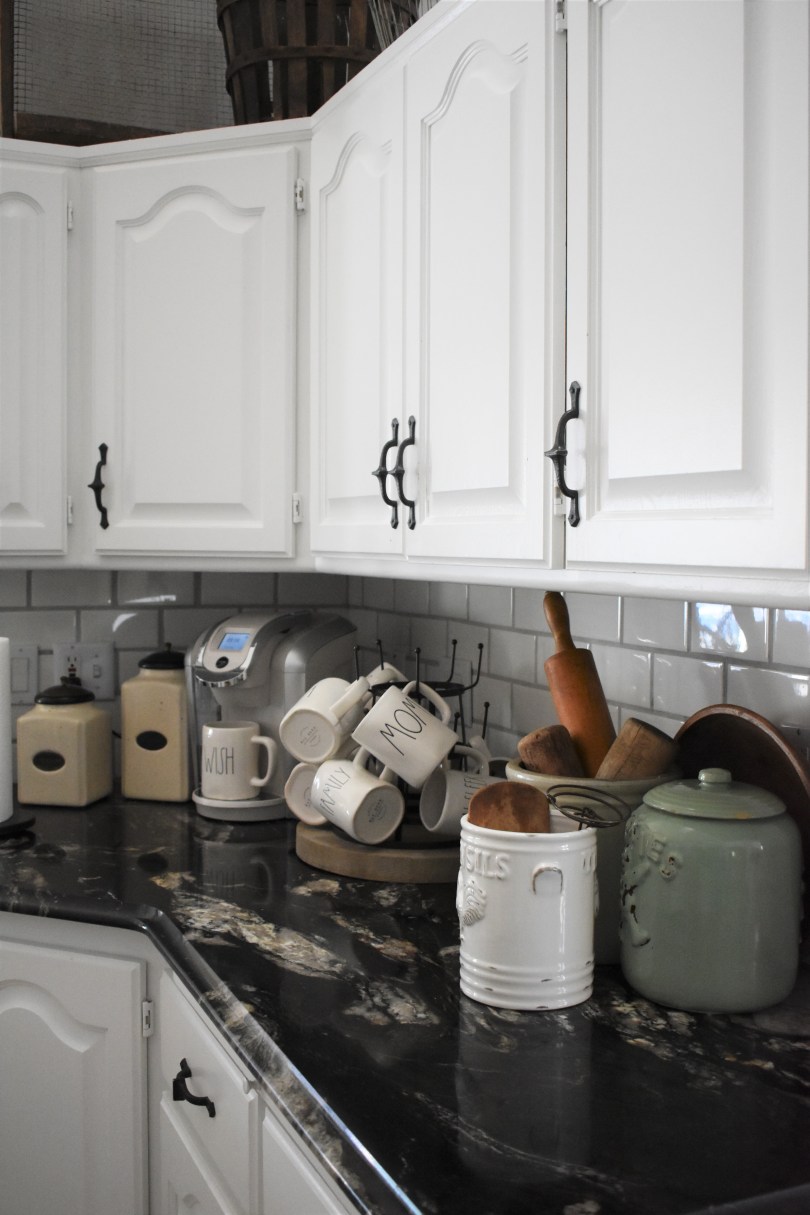
You may be thinking, “Gee, I’ve been reading Audra’s blog for a while and I never noticed her hideous back splash? I even toured her house during the Homes for the Holidays and didn’t realize is was so gross!” No, you are not blind. I HID IT with a TON of decor. In all honesty, my kitchen counters were pretty cluttered, but that was because I was hiding this geometric Aztec mosaic back splash full of all the wrong colors with decor. See? This is what I did:
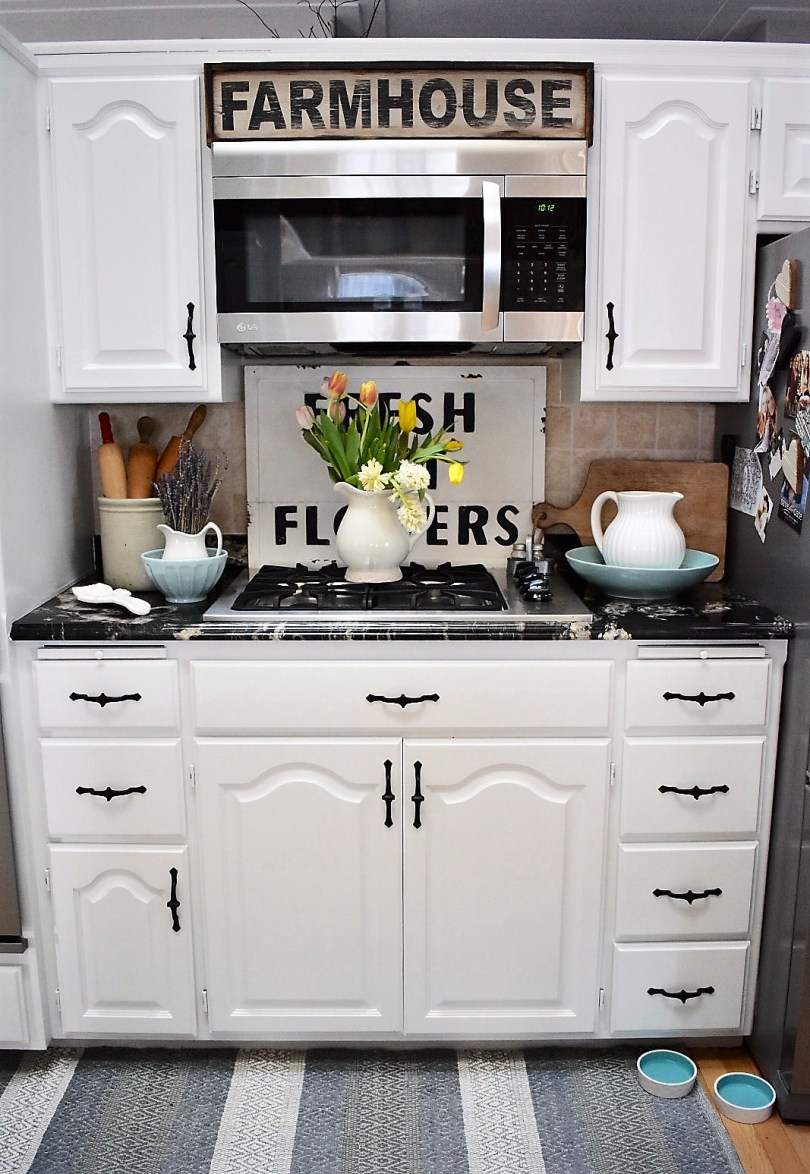
Do you know how many times that “Fresh Cut Flowers” sign fell on a pot when my husband was cooking? Too many times. (Maybe it was motivation for him to do the subway tile? Haha!) And honestly? I can’t even find a photo of my kitchen from the other angle, I think I just always avoided that angle in photos. I did have a huge black bread box on the counter blocking the mosaic, but I just didn’t photograph that spot. It was not my favorite.
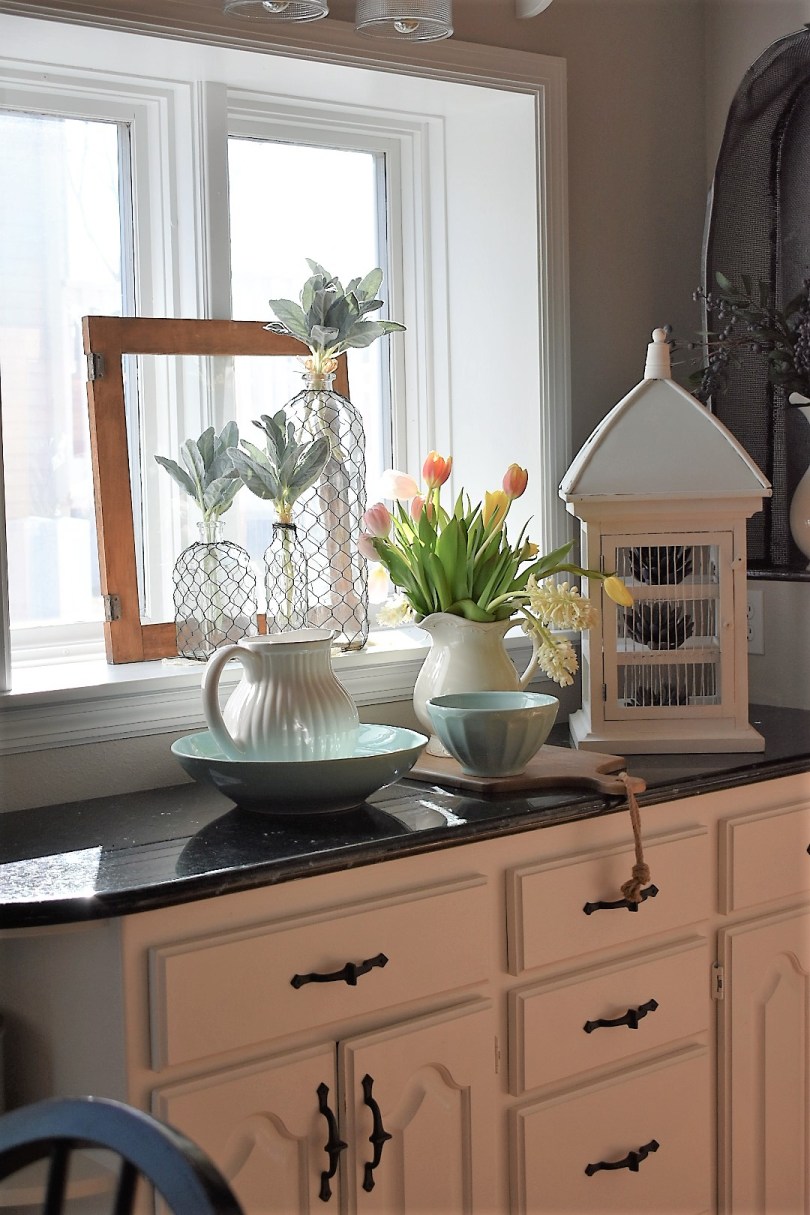
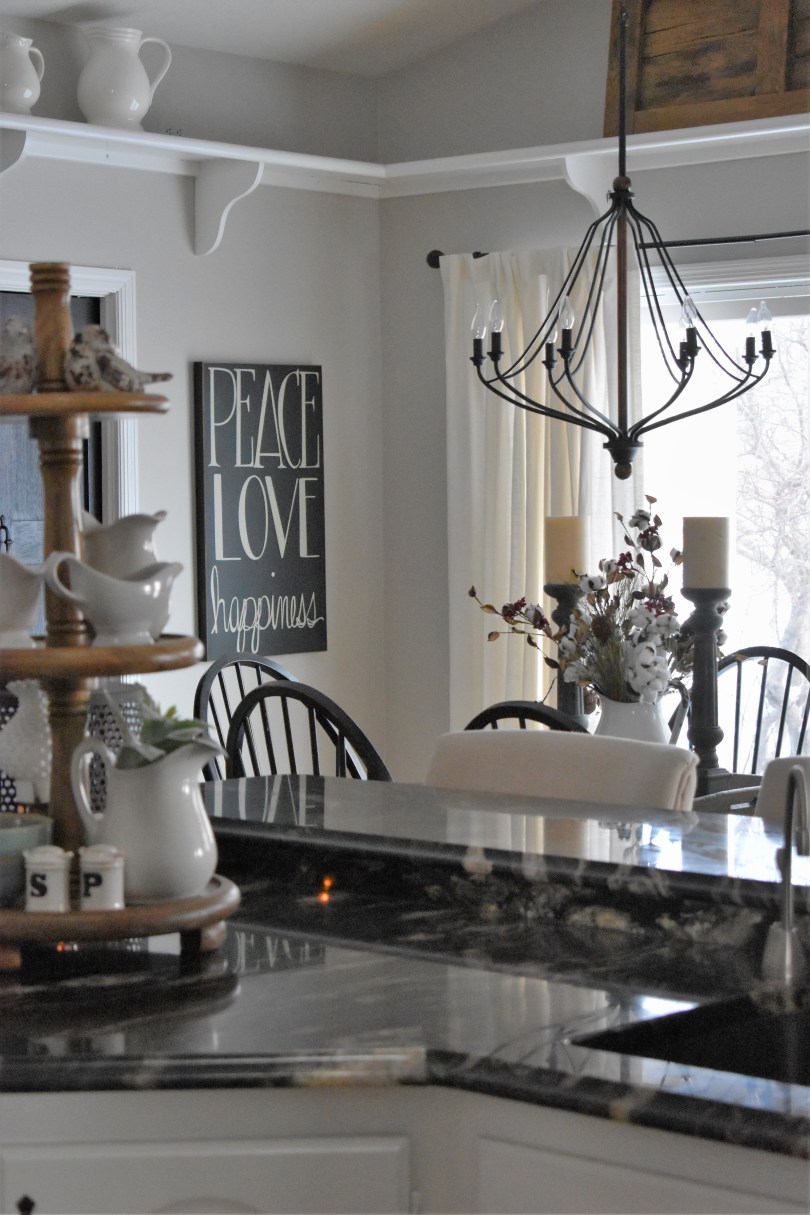
But now that all is said and done, no angle is off limits! Let me take you on a tour of some of my favorite aspects of our kitchen. The built in hutch is definitely one of the features I enjoy the most. And no, the back splash here was not a mosaic tile – it was a mirror! (Scroll back up to the “before before” photo to remind yourself.) I painted it black, you will remember, in a moment of desperation.
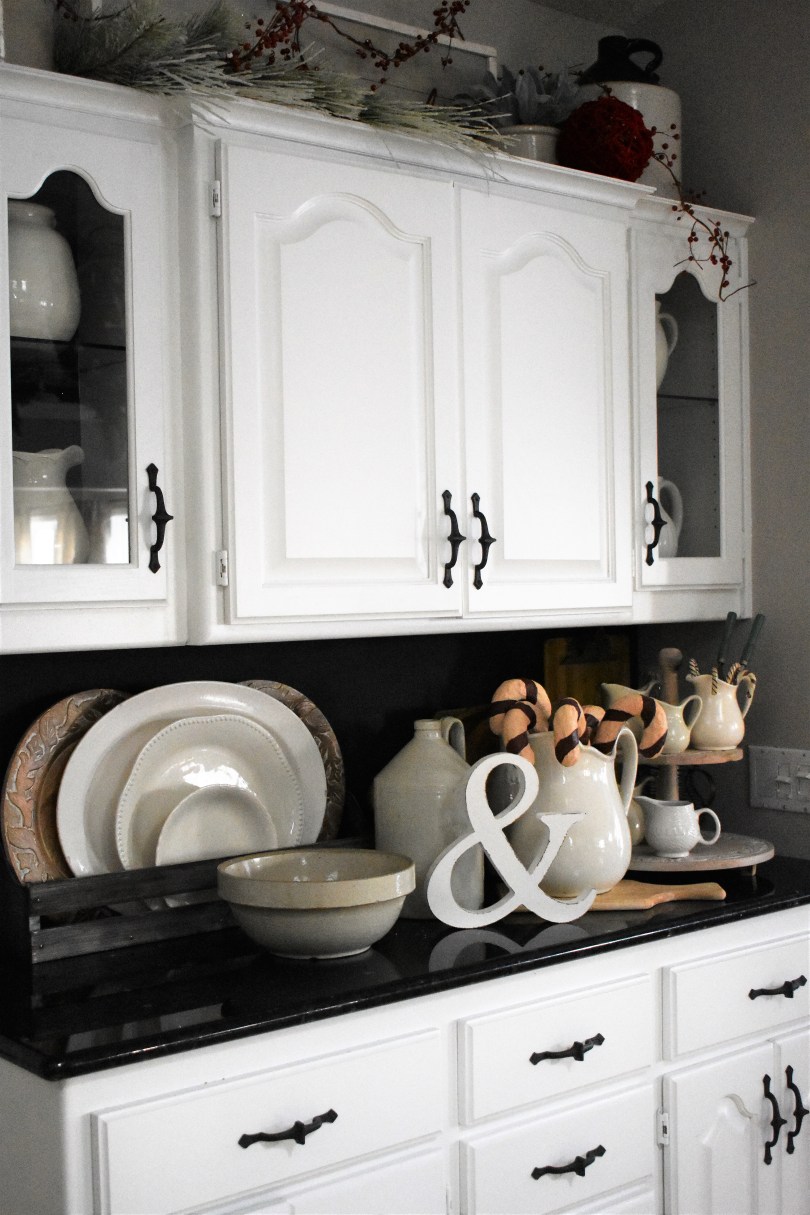
But now? The mirror is gone forever and in its place is subway tile, too! We went with white grout in this space instead of grey as the granite on the hutch was solid black, and not patterned, so we wanted to keep with the feel that the hutch is not an extension of the kitchen cabinets but a separate feature. I just love it . . .

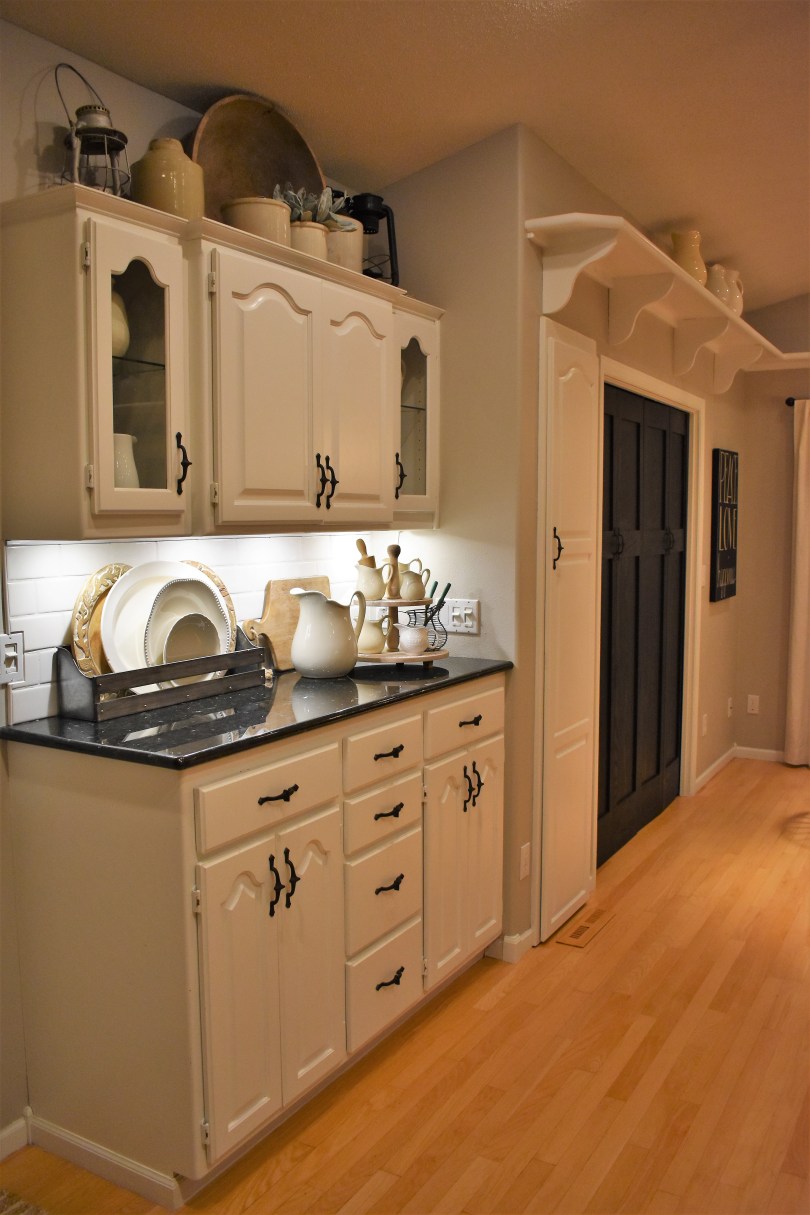
Matthew also installed under cabinet lighting and it just is so cozy in the evenings.
And so there you have it, the big kitchen reveal! It is honestly my favorite kitchen ever and I really look forward to waking up every morning and enjoying my coffee and morning paper in this space. It is such a great way to greet the day! (Of course, is any space truly done? I am already plotting some pendant lighting and board and baton for the peninsula, so stay tuned!)
Hot Off the Press | On Point Construction

Last but not least, we have a very exciting announcement as we decided together this fall to get into the construction business. Yes, it’s true – I am now sharing my super man husband and his construction abilities with the world! Matthew is now a licensed contractor and already busy working for several clients. You can follow him on Facebook at On Point Construction – Fargo. We’ve posted several pictures of his projects over the years there (this one included!) as we know many of you will enjoy following along on his construction adventures! (And of course, I am also available for design consulting through On Point if anyone would welcome guidance in that area, happy to help.)
On that note, I thought I’d leave some of the scary demo photos and Matthew in action to the end. Because after all, the home update process between the before and after photos is exactly that – a process. Here are some of the highlights:
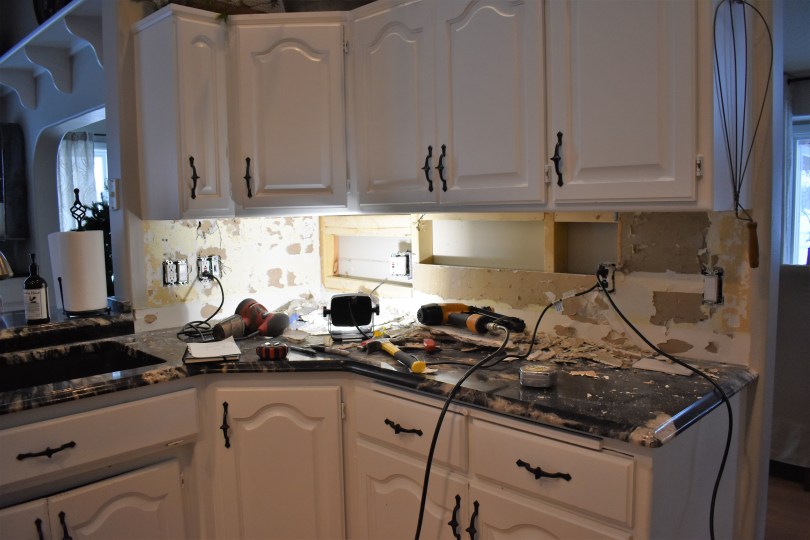

Yes, it was messy – and yes, those were actual holes in my walls! But Matthew is passionate about his projects, even more of a perfectionist than I am. I am the one saying, “Leave it! Who will notice?” when something has an eighth of an inch gap or is slightly crooked or off center, while he is the one insisting that it be perfectly level/straight/correct and ripping it out and doing it again until it is.
With that kind of approach, I just know he is going to be tremendously successful and respected in his new profession. (Really proud of you, honey!)
In fact, if you have any home updates you’ve been considering (from basements to attics and everything in between) feel free to reach out to him at onpointfargo@gmail.com for an estimate.
Thank you so much for stopping by our latest project! It’s fun to share the progress with all of you.
Peace, Joy and Blessings,
~Audra
See, I am doing a new thing! Now it springs up; do you not perceive it? I am making a way in the wilderness and streams in the wasteland.
Isaiah 43:19


What type of paint did you use? Can you explain the process? I do not see oak wood grain. Very nicely done. I have the same oak everywhere. Yikes
LikeLiked by 1 person
Paint was Benjamin Moore – cabinets were stripped, sanded, primed, painted and sealed. It is laborious but worth it. 👍 My husband is a contractor and can give you a quote to do yours if you would like 😃
LikeLike
🙋🏻♀️Thank you! I may do that. What do you think of chalk paint? That seems to be popular when painting wood cabinets and apparently doesn’t require many coats. How many layers of Benjamin Moore?
LikeLike
Two coats of Benjamin Moore – I love chalk paint but don’t feel it holds up well for kitchens – they are too high traffic. We did chalk paint in our last house for our cabinets and I did not like it as much as my current painted cabinets. 💕
LikeLike
Looks great! I especially like the backsplash. My ideal kitchen would look similar to yours color wise but with quartz countertops. Thanks for sharing your beautiful kitchen!
LikeLiked by 1 person
Oh me tooooo! I love quartz – but sometimes you just have to work with what you have – and we have this granite. 🙂
LikeLike